Skip to content

Set Up AutoPay by Following This Guide

The AutoPay feature in MyAccount offers you a convenient way to manage your payments, ensuring that you never miss a due date.

Click the arrows to navigate to each step.

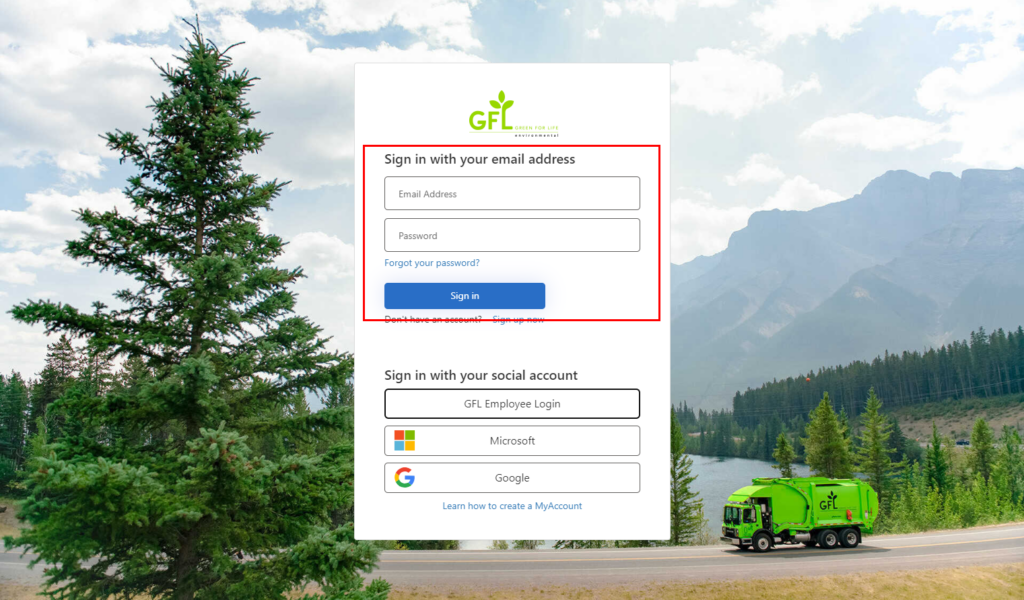
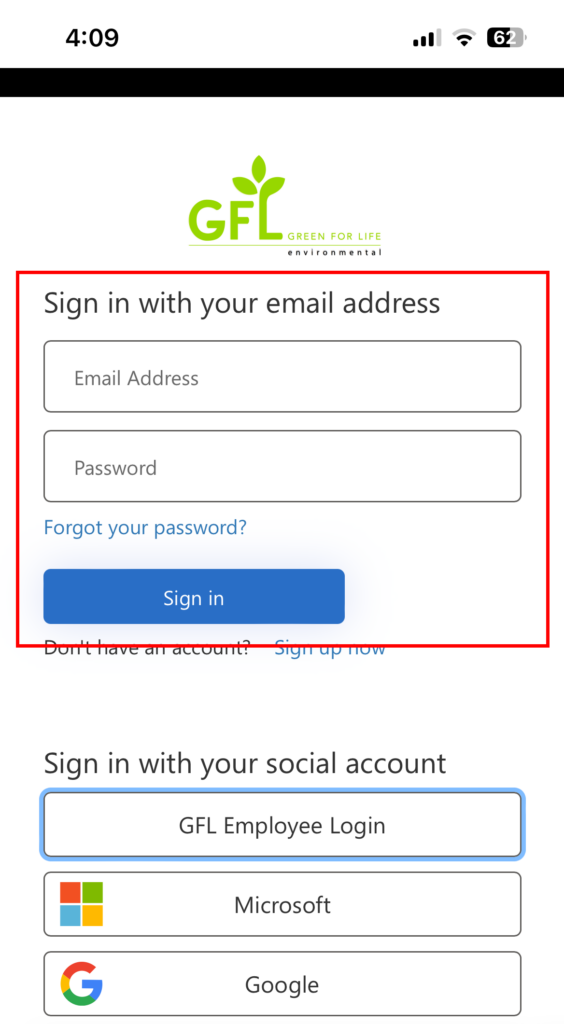
Step #1. Log In to Your MyAccount Profile

Log into your MyAccount using your username and password. If you don’t have an account, click on the ‘Sign Up Now’ link to create one.


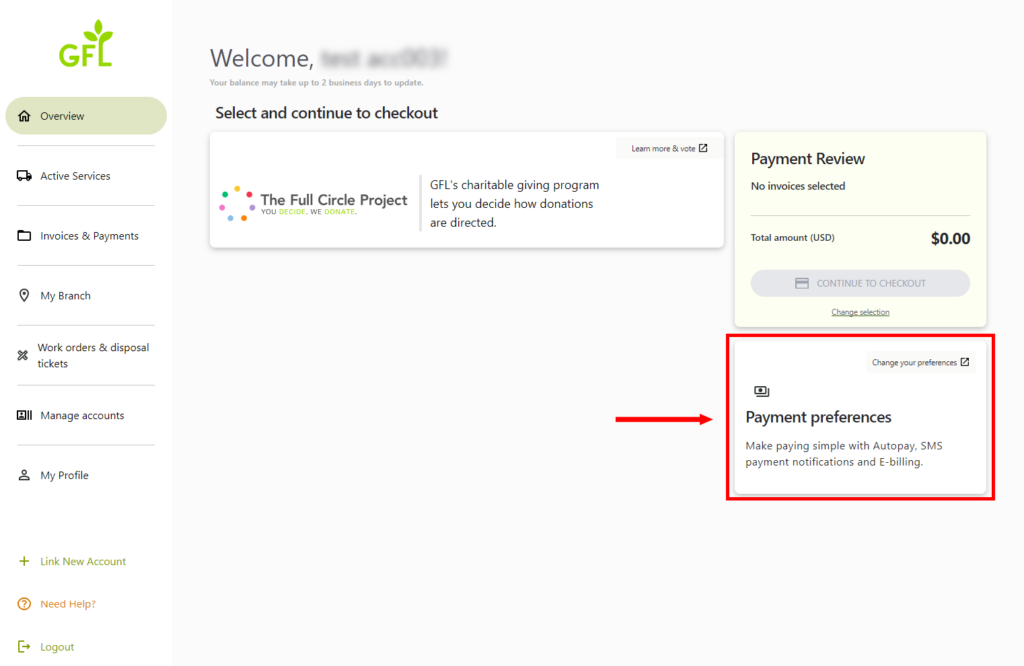
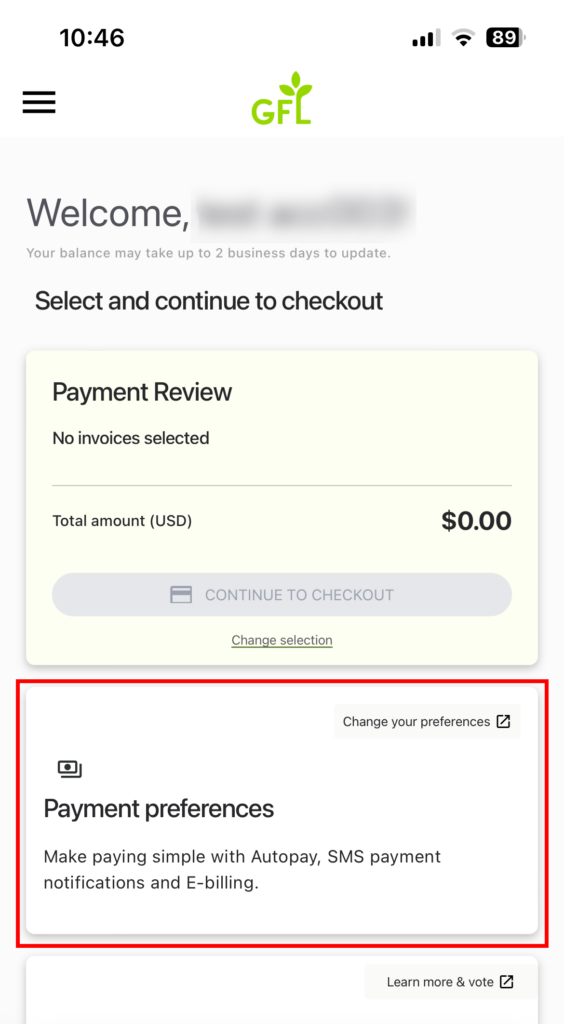
Step #2. Select Payment Preferences

On the overview page, click the ‘Payment Preferences’ button located on the right-hand side of the screen.


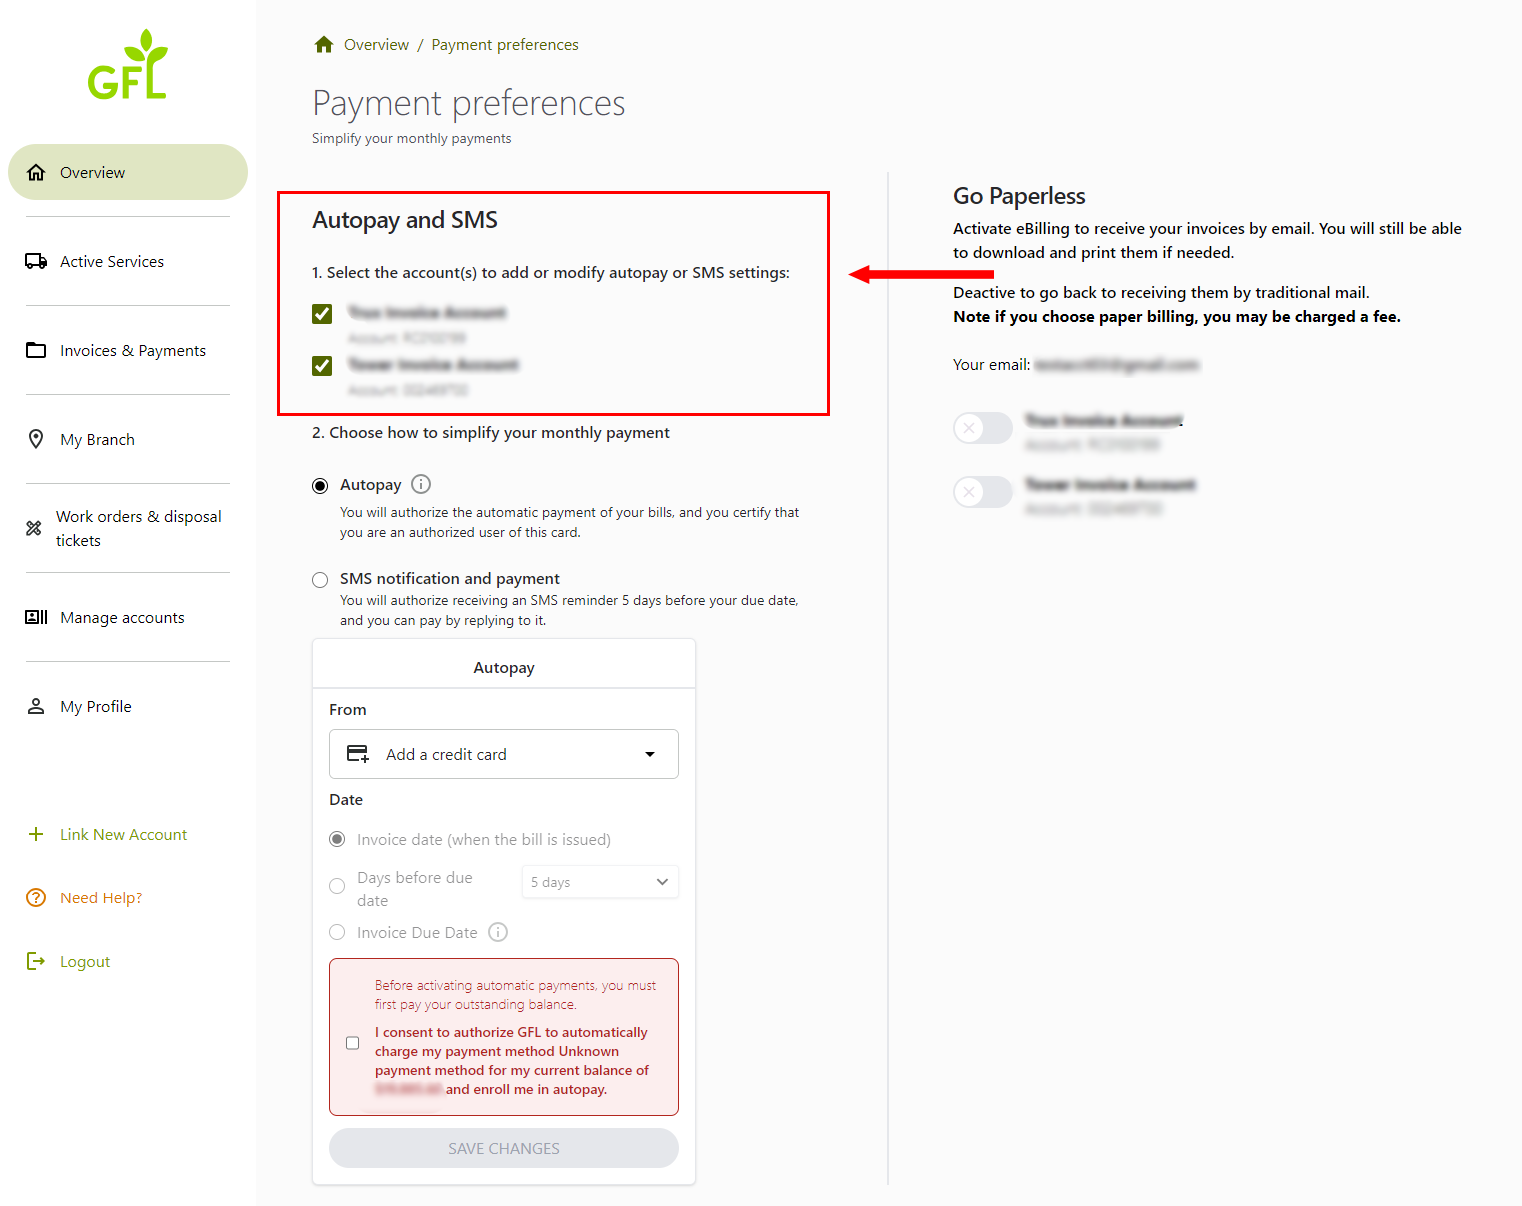
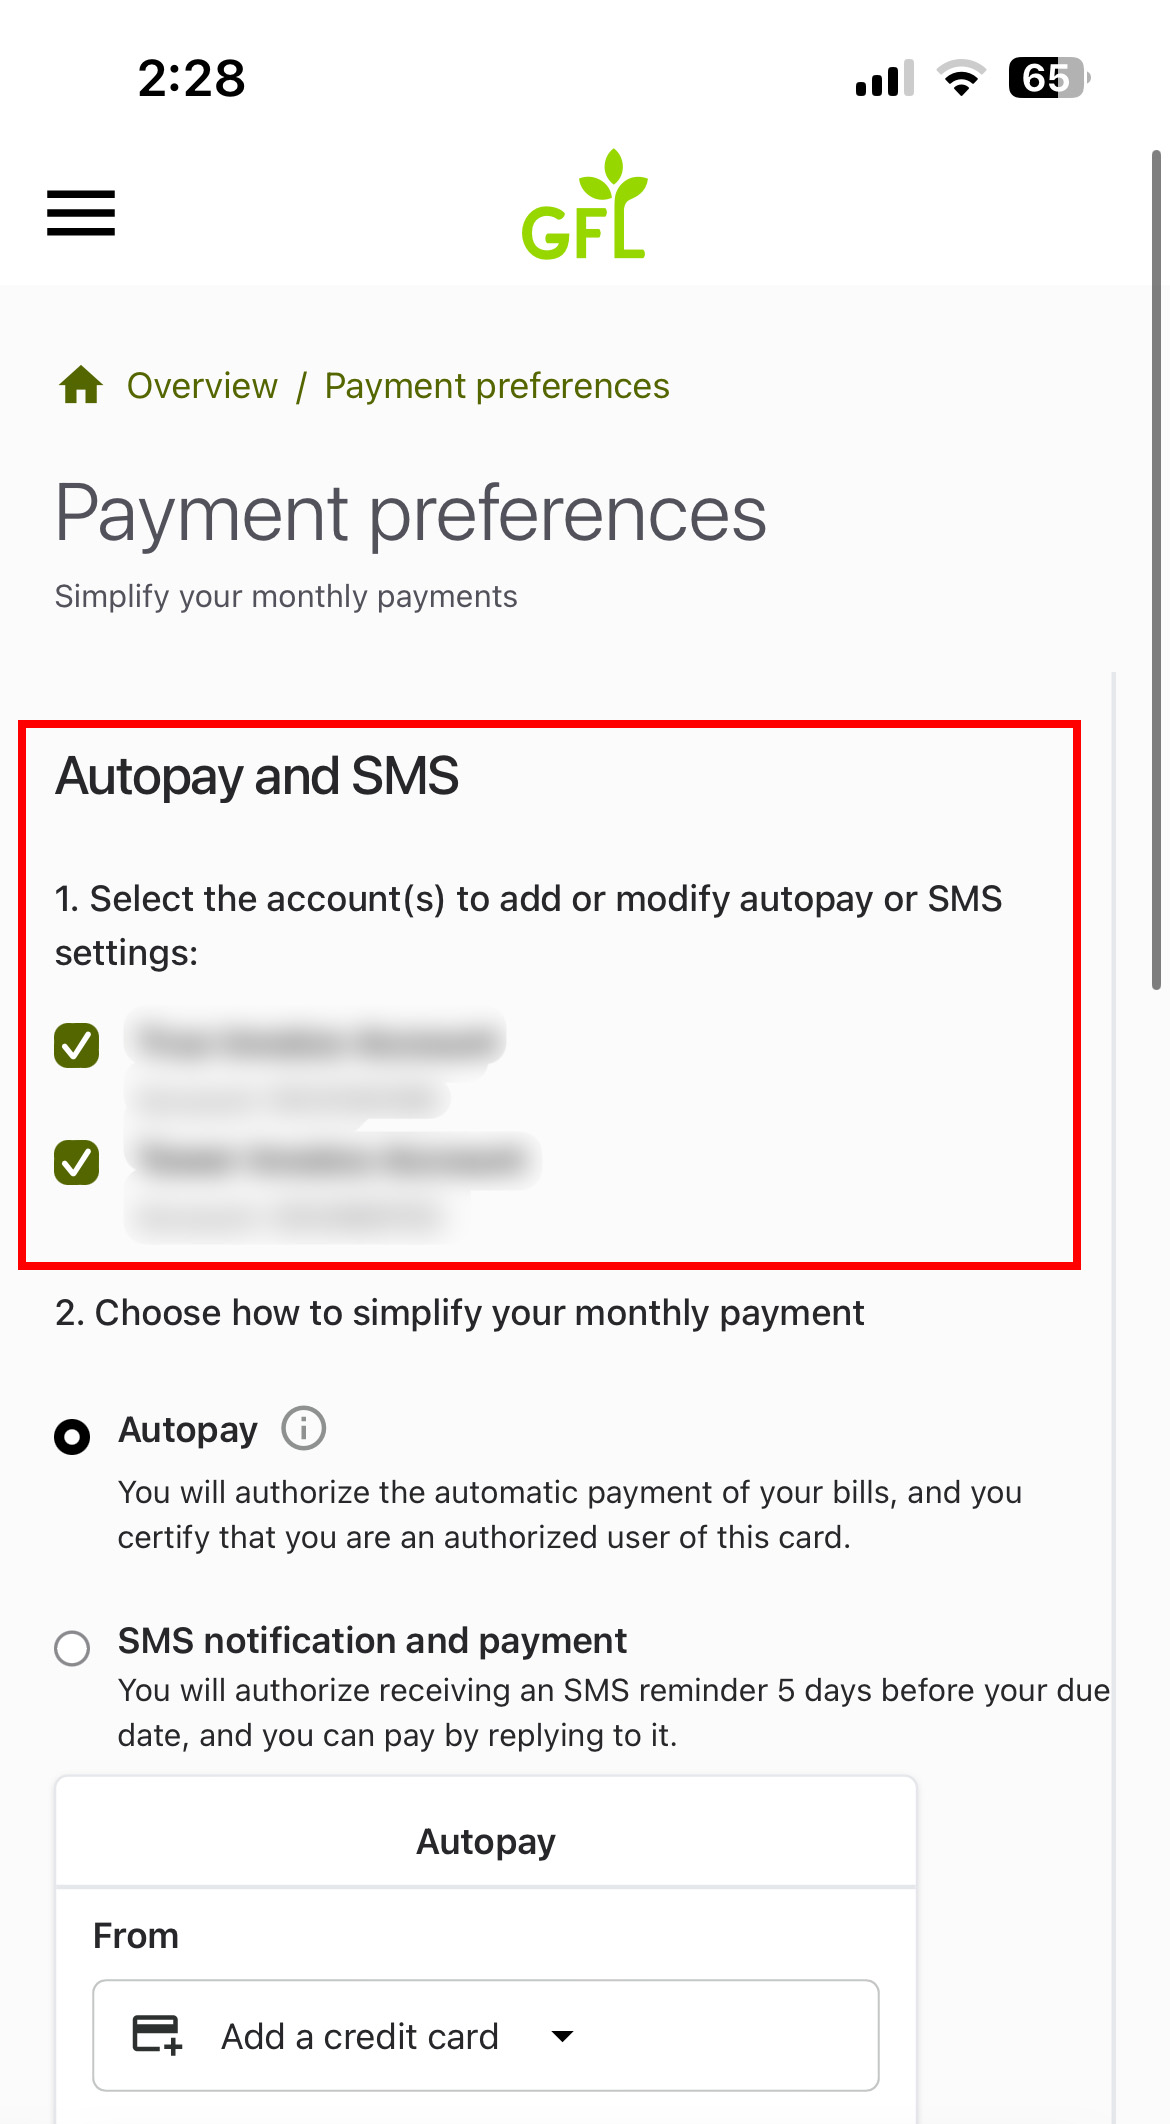
Step #3. Choose Accounts for AutoPay

Select the account(s) you want to set up for AutoPay.


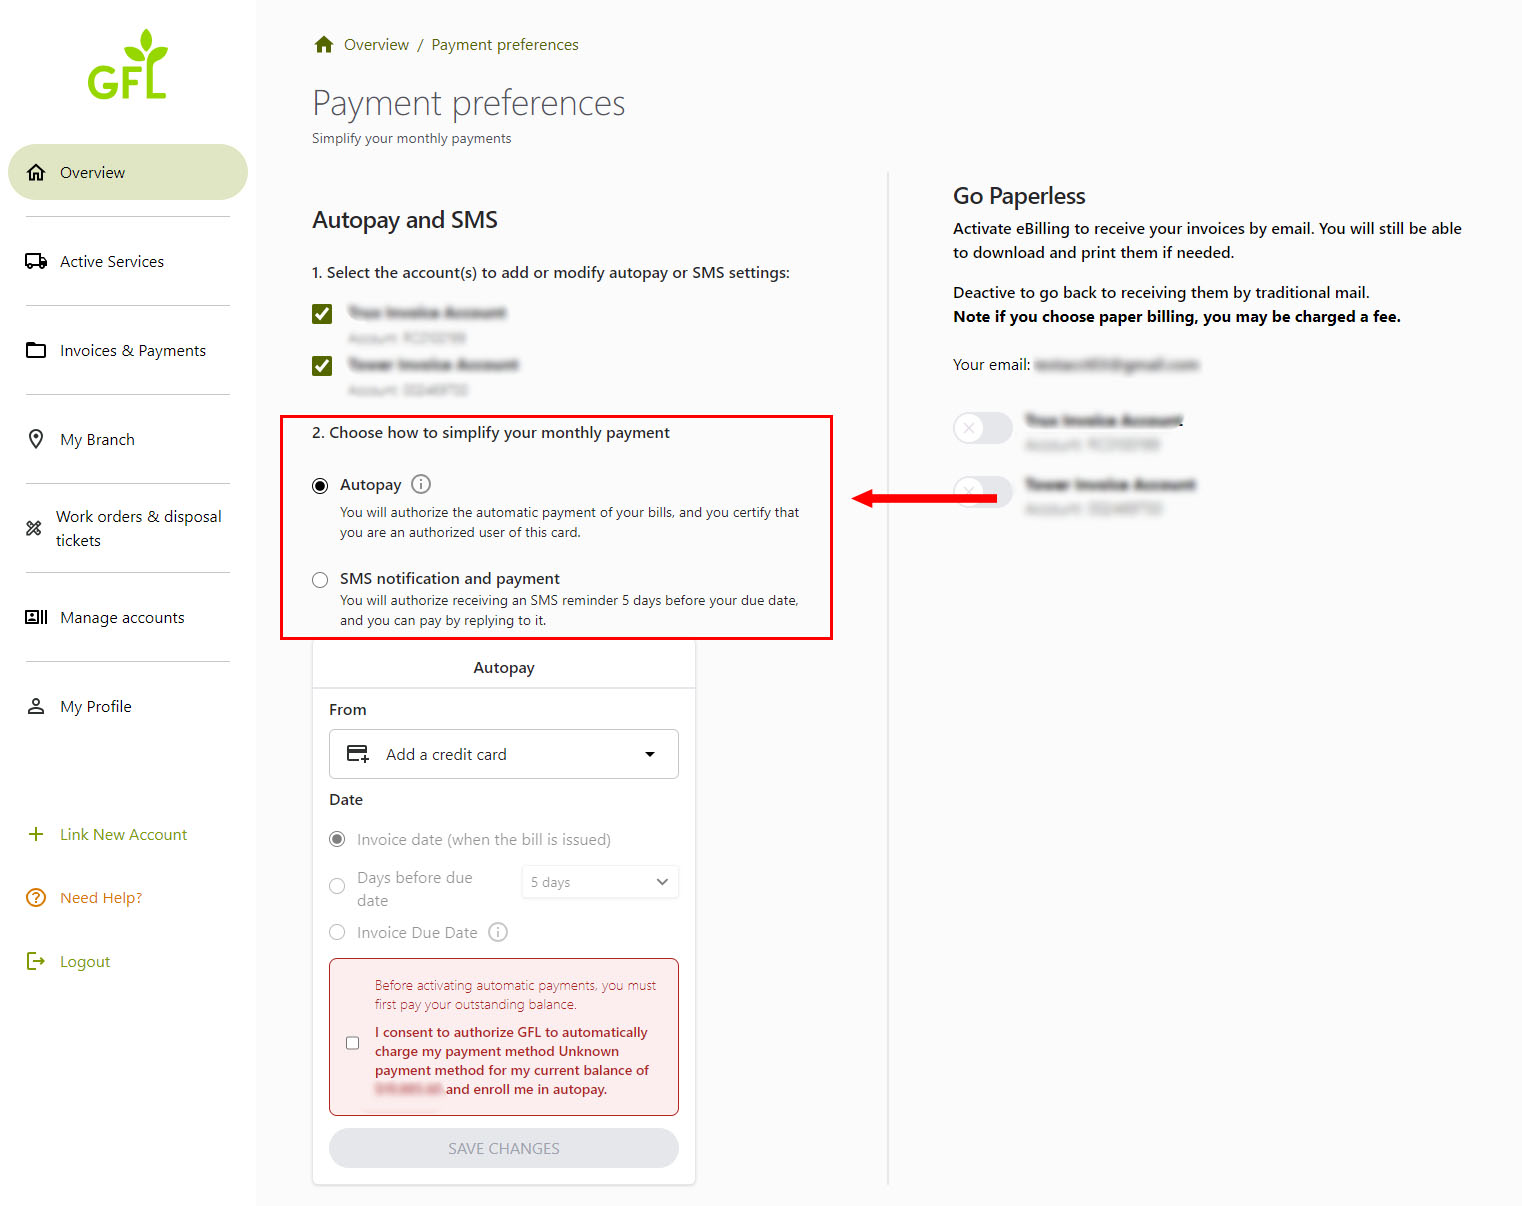
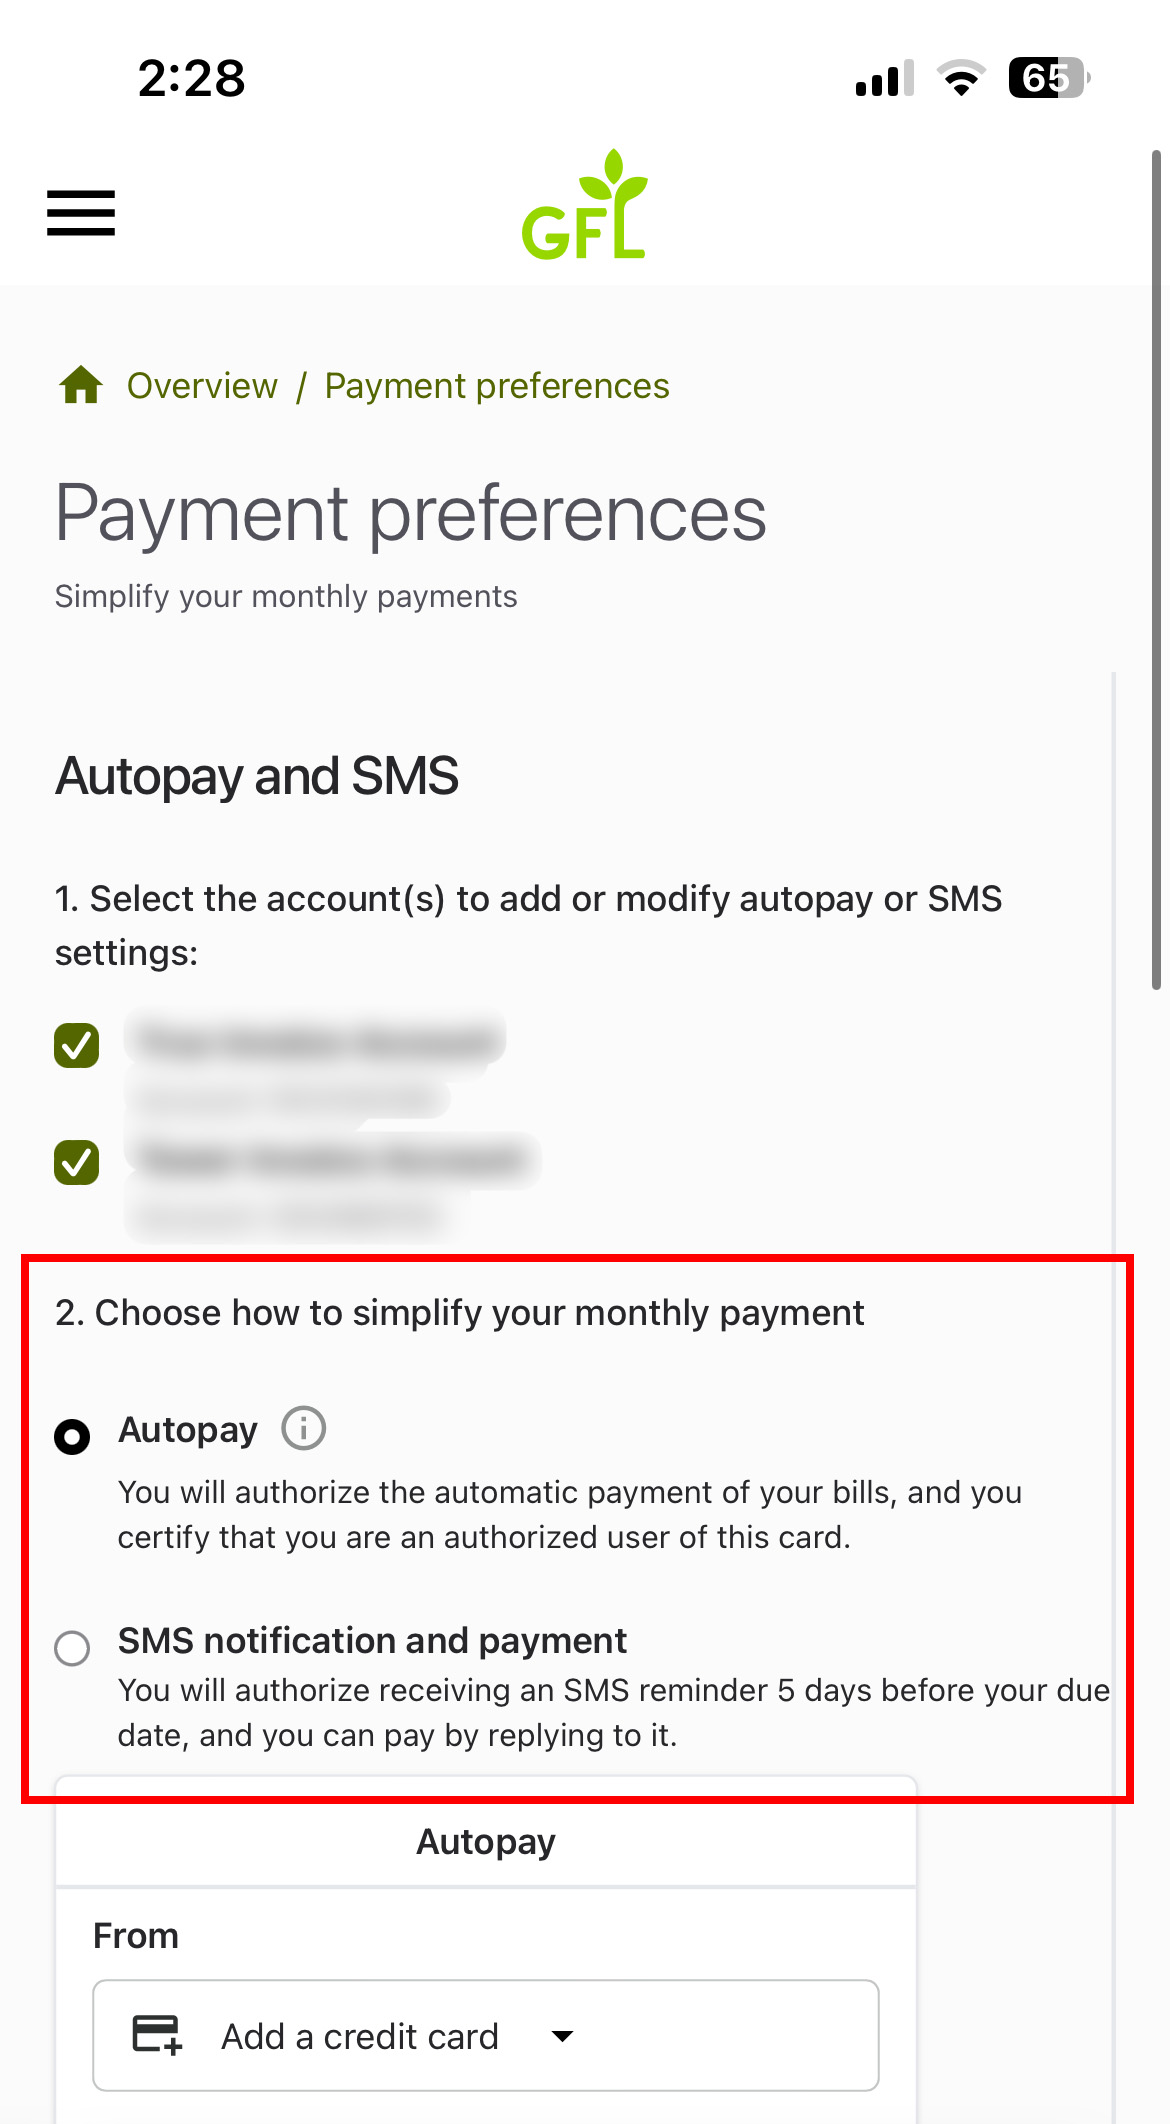
Step #4. Enable AutoPay

Select the AutoPay option.


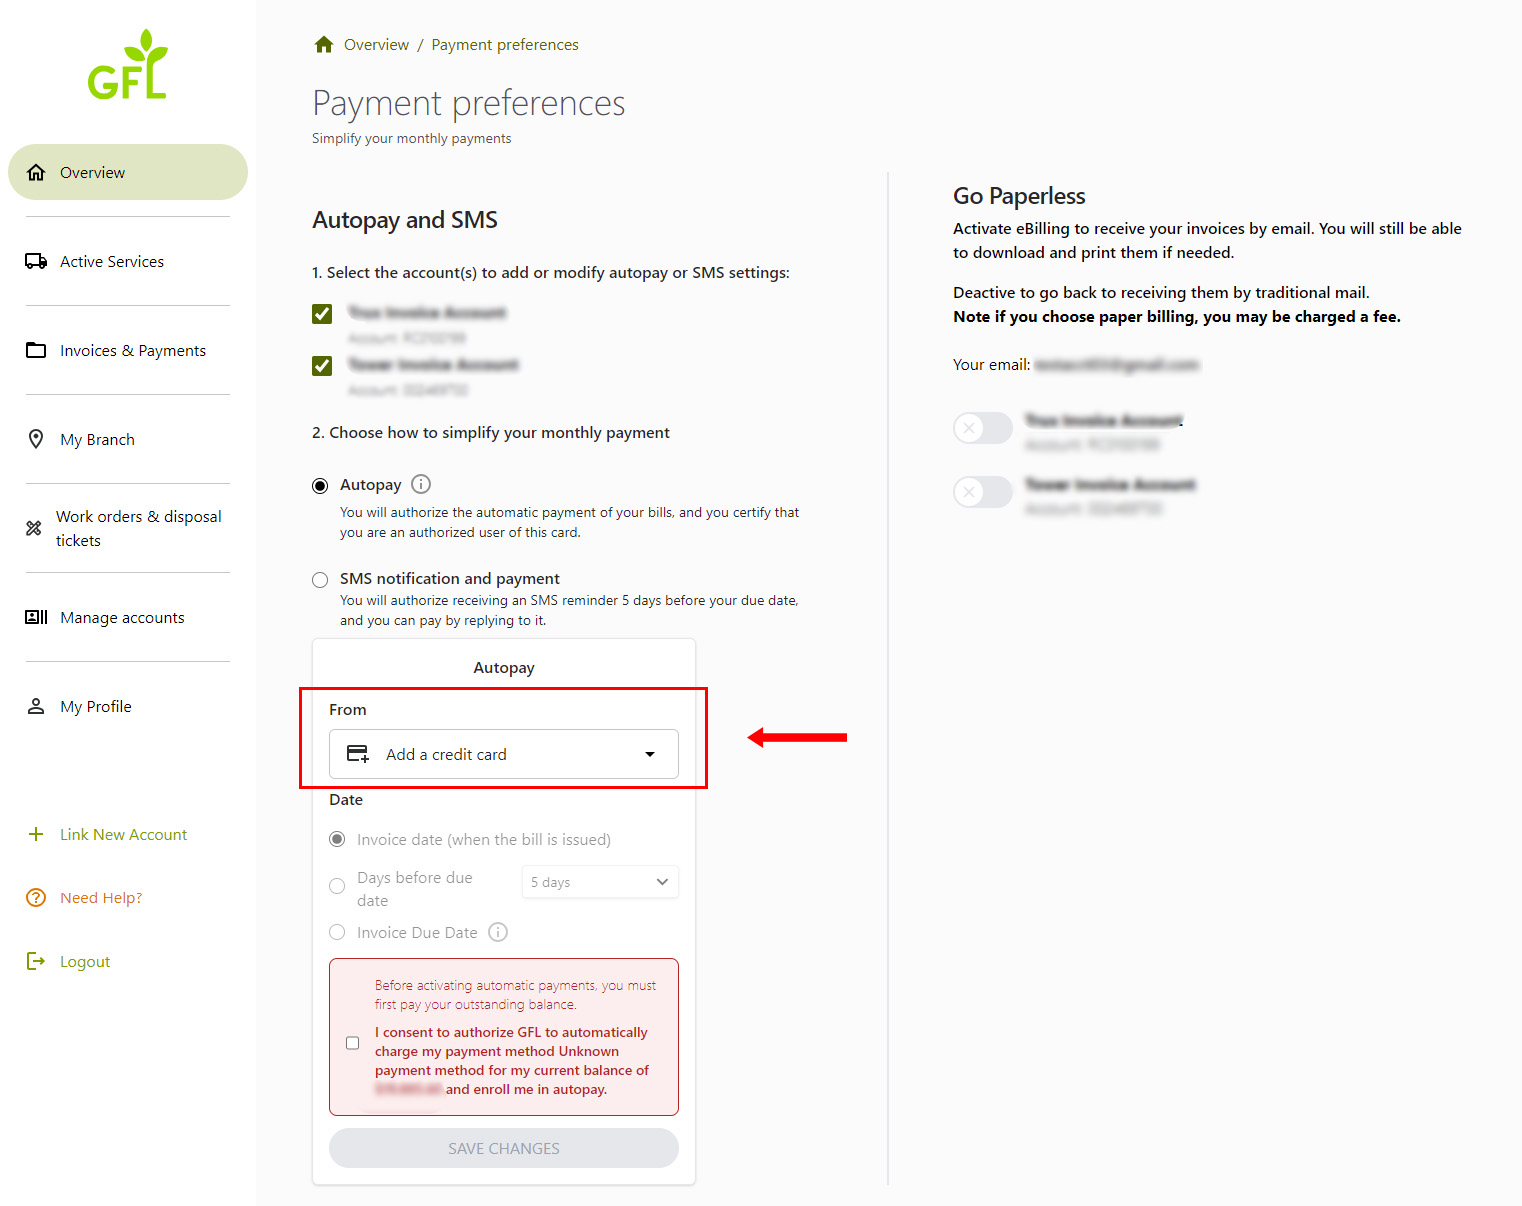
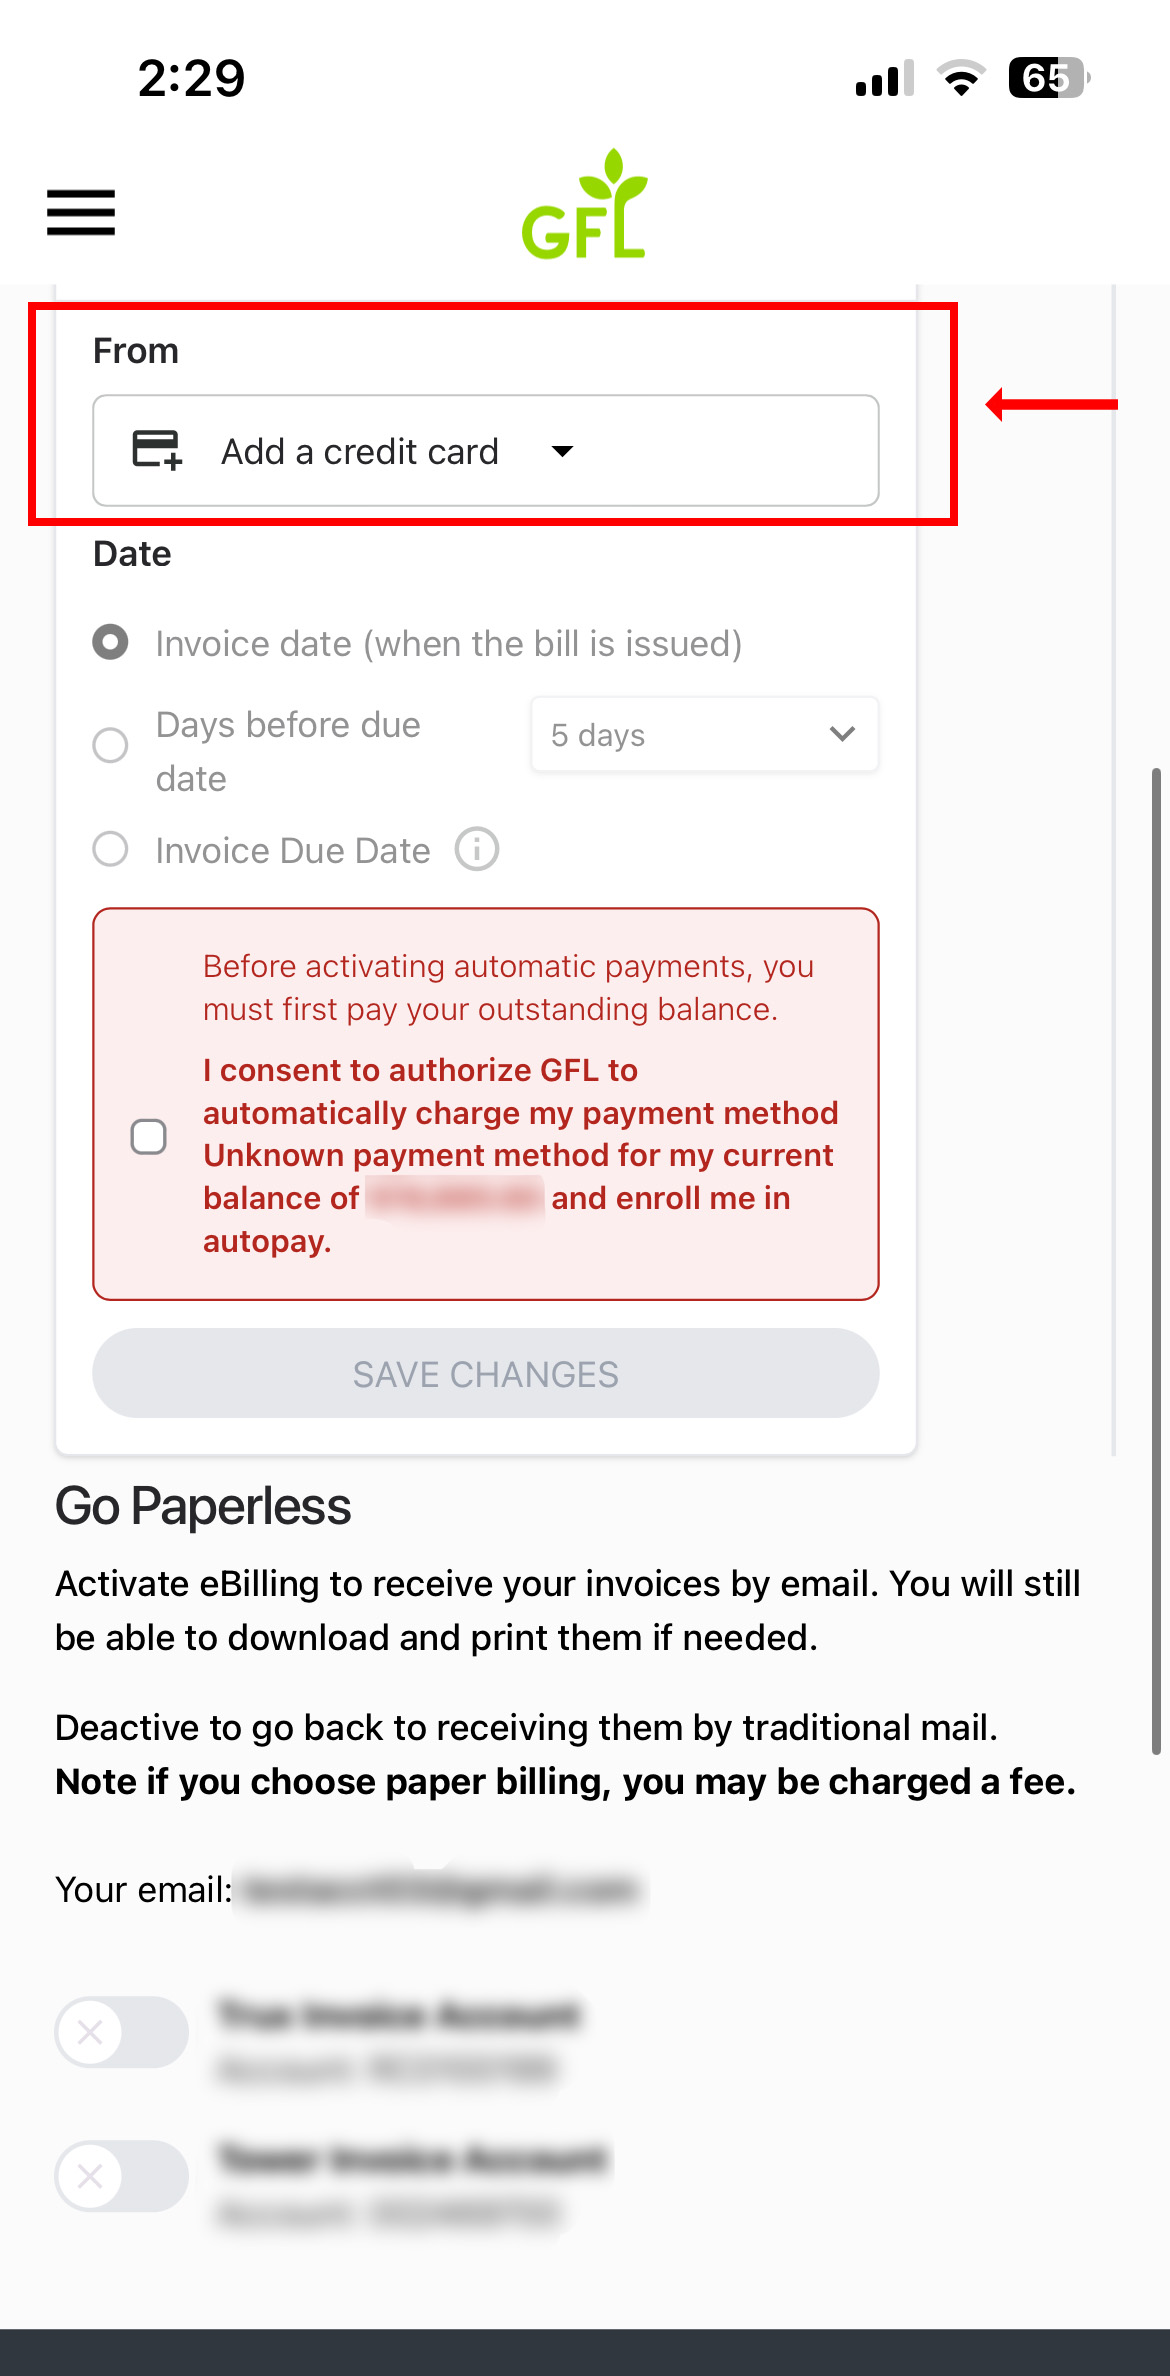
Step #5. Enter Your Payment Information

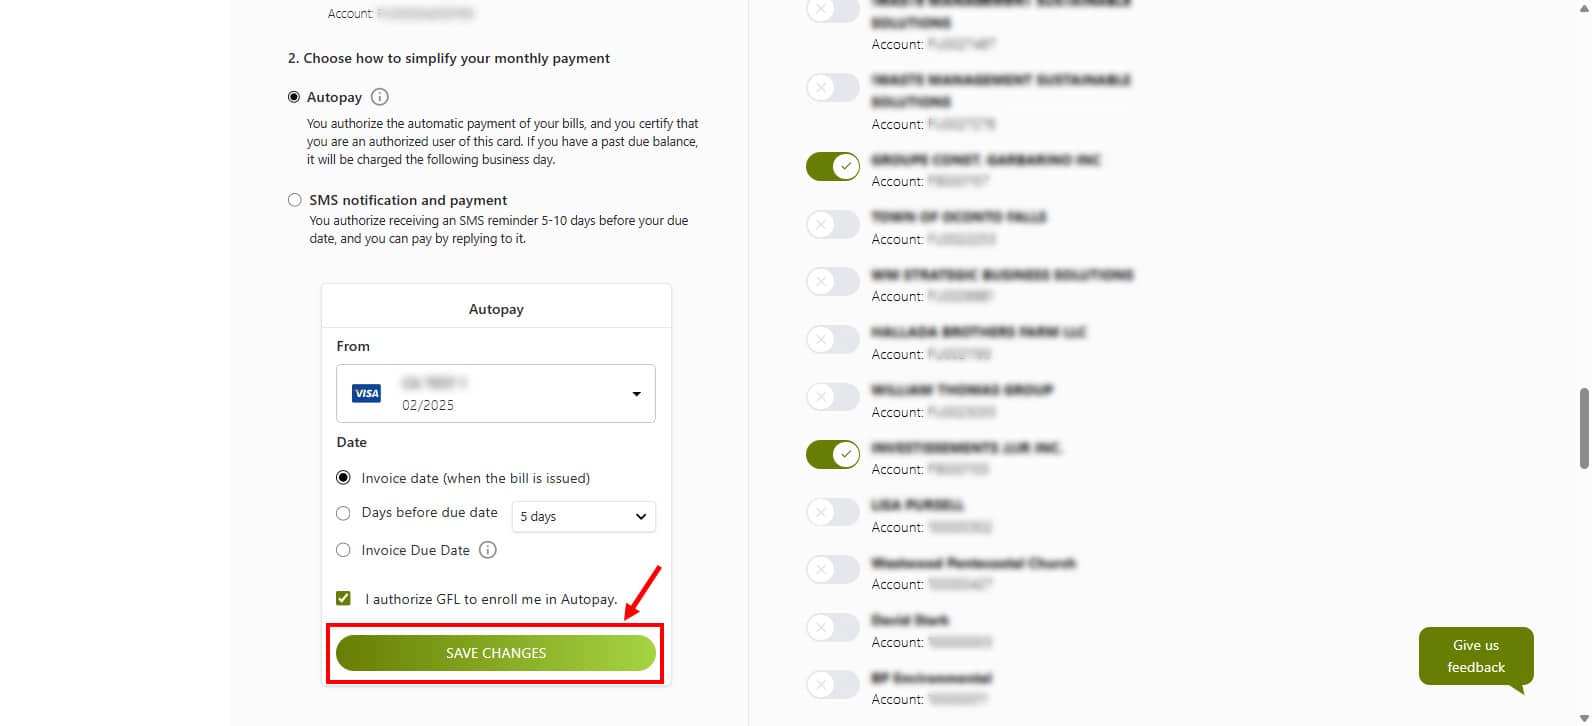
In the ‘From’ section, enter your credit card or bank account details. Make sure all required fields are filled out.


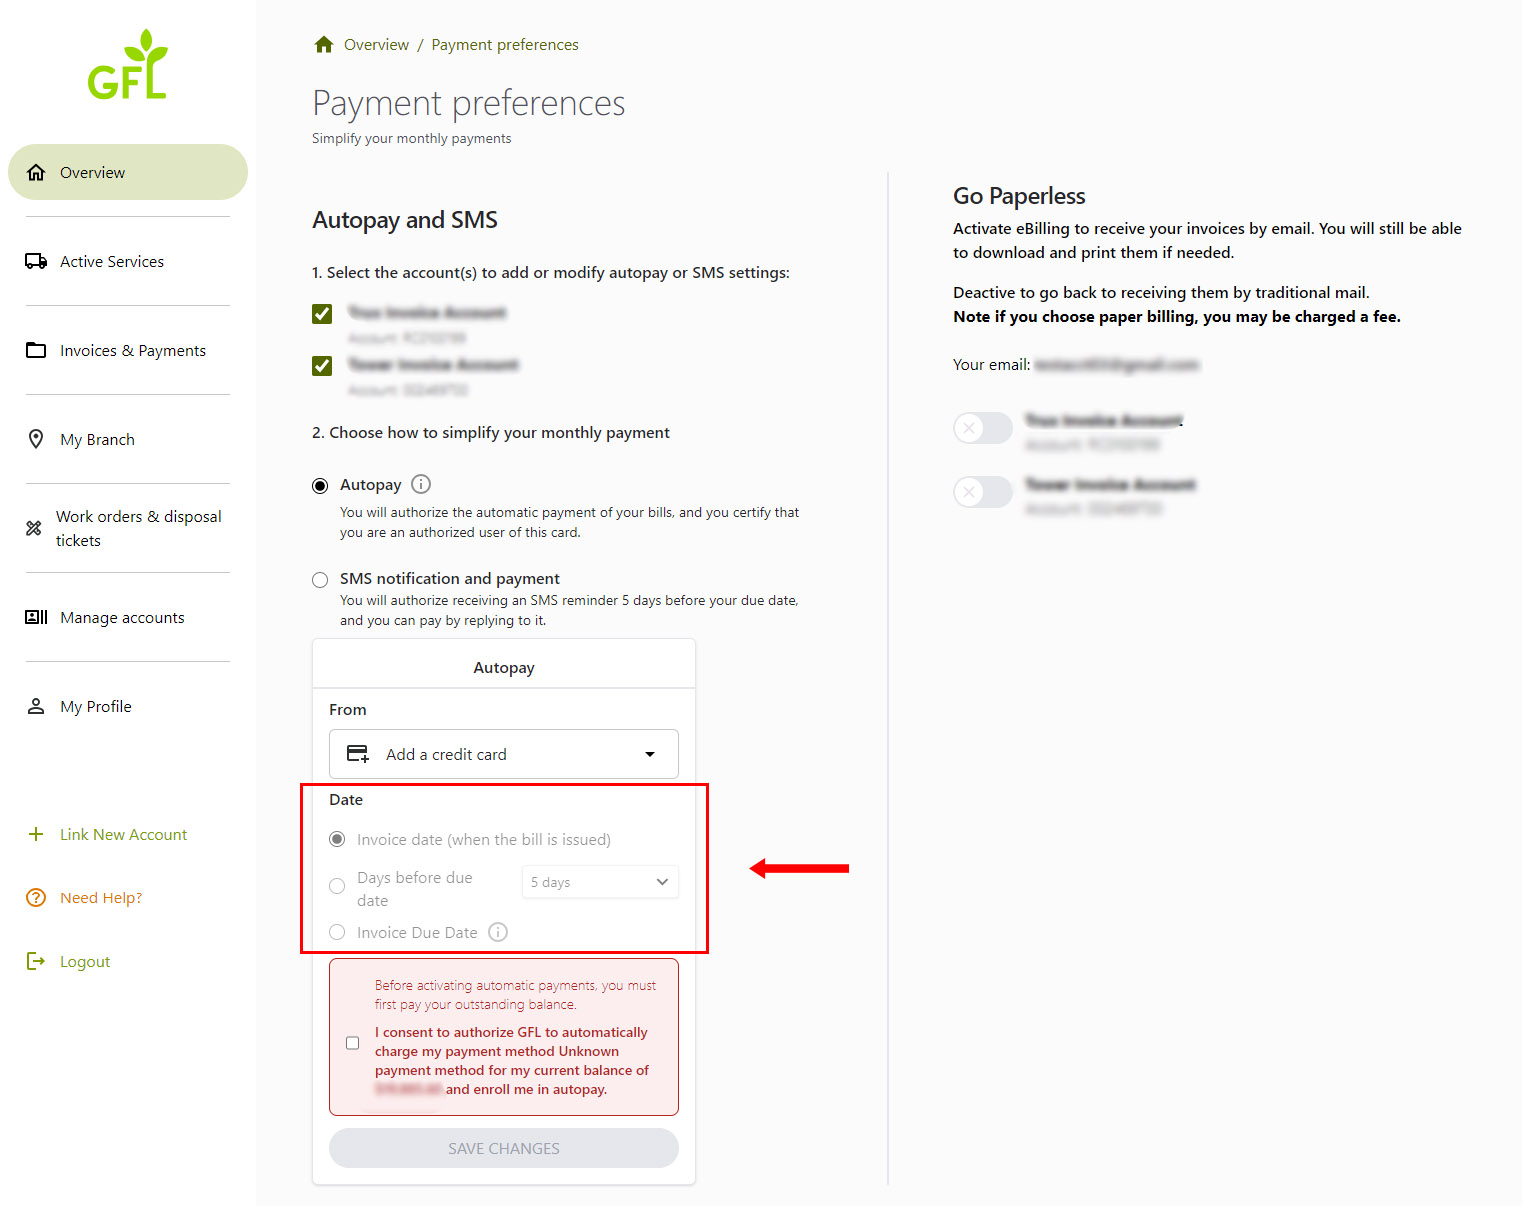
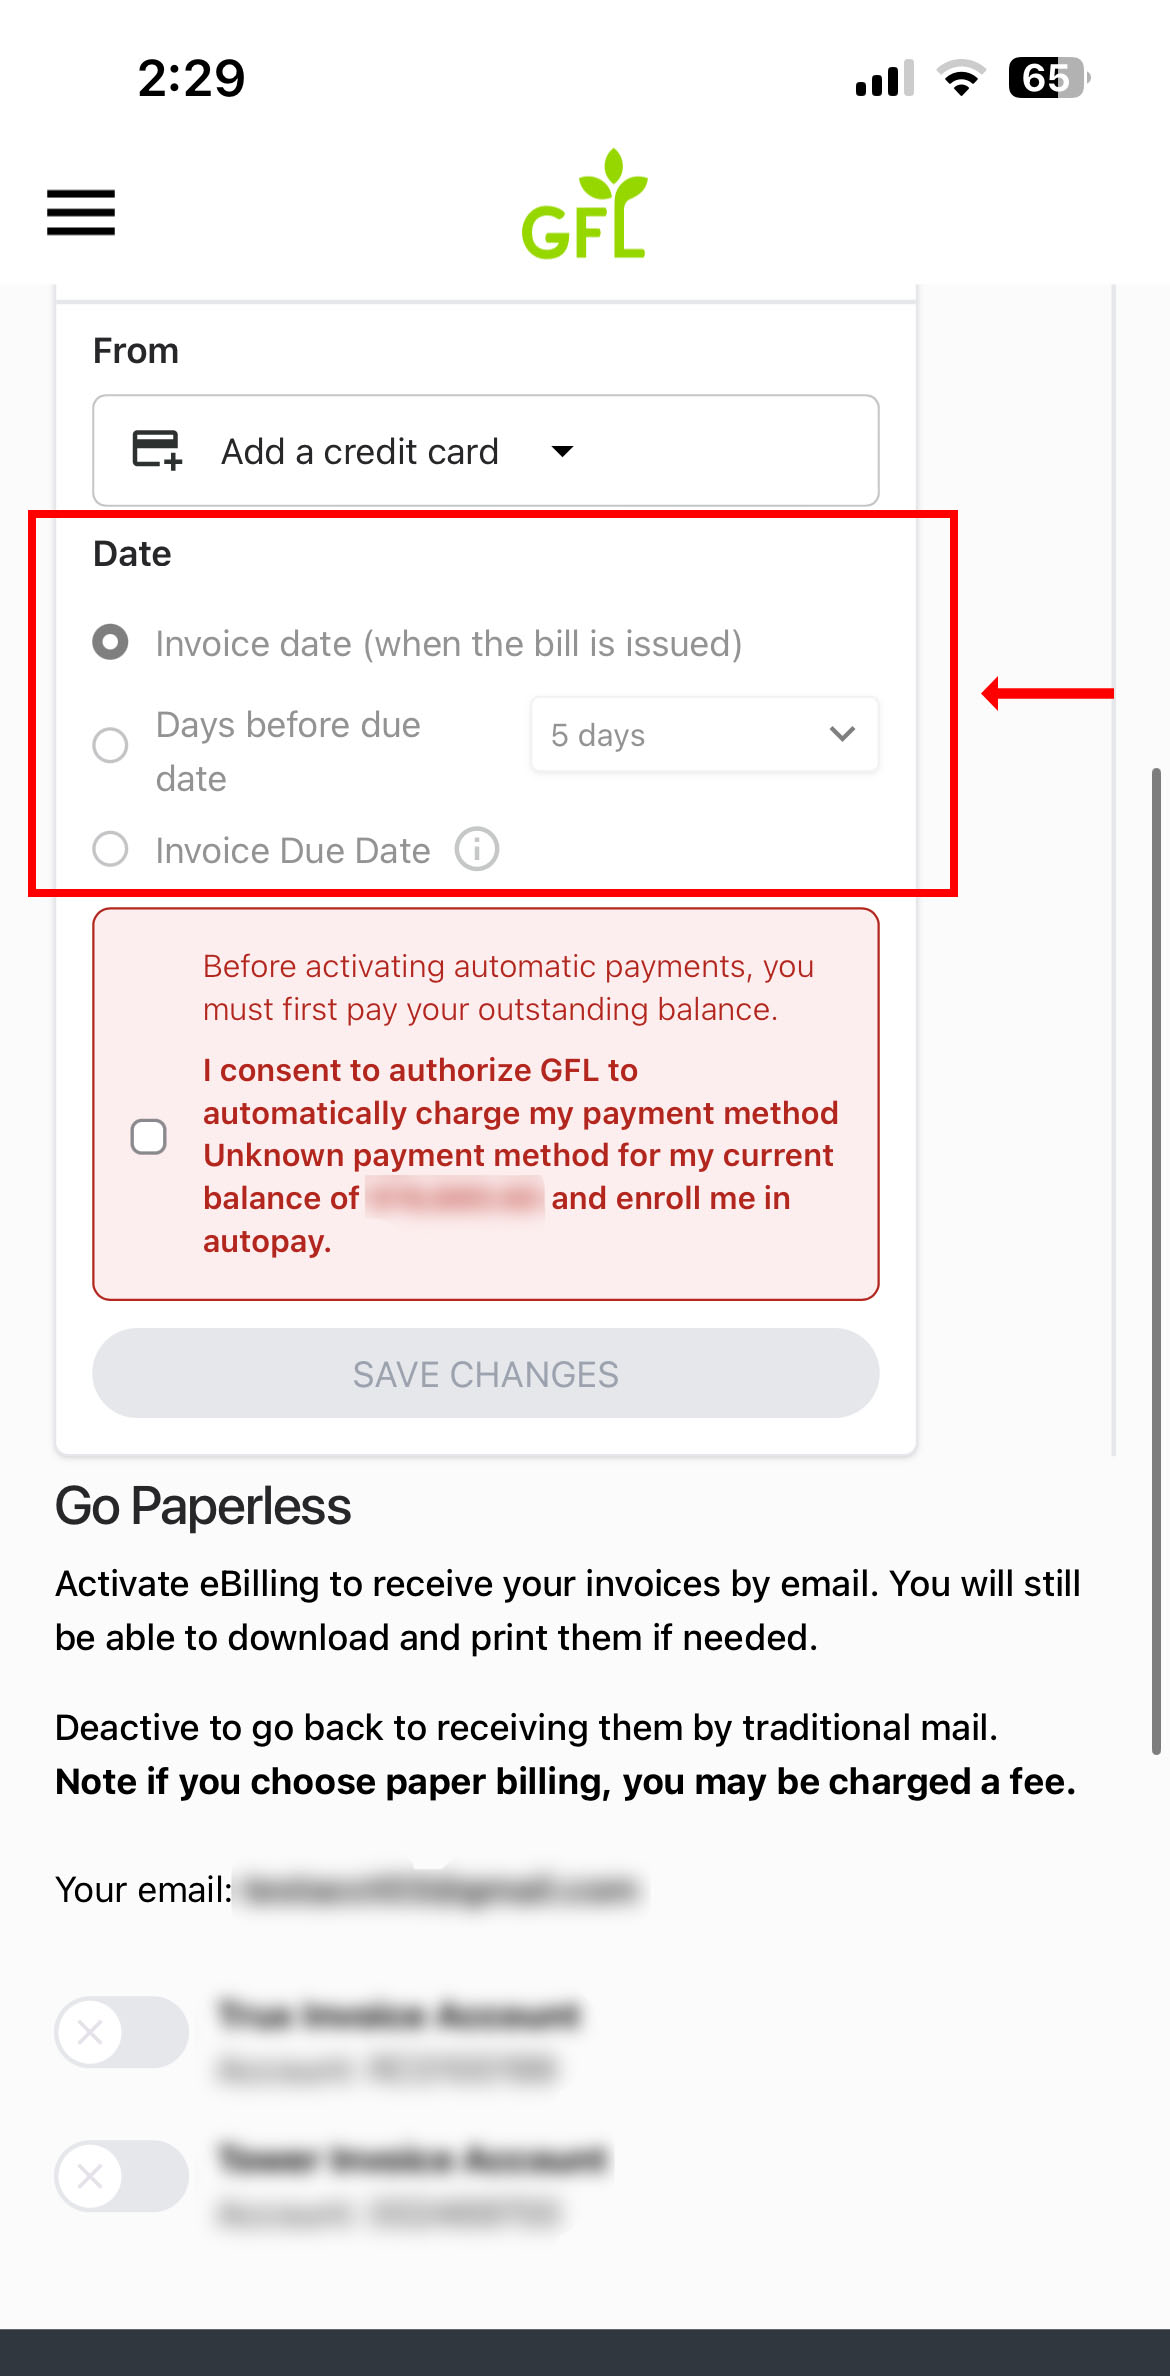
Step #6. Choose Payment Schedule

In the ‘Date’ section, choose when the payment will be charged to your card or withdrawn from your account. You can select one of three options: ‘When the Bill is Issued’, ‘Invoice Due Date’, or ‘Days before Due Date’. If you choose ‘Days before Due Date’, use the drop-down menu to specify how many days before the invoice due date you’d like AutoPay to run.


Step #7. Save Your Changes

Click the green ‘Save Changes’ button. If you have a balance on an account, then you will be asked to authorize a payment to that account before completing your enrollment. Click the green ‘Save Changes’ button. In the ‘Confirm AutoPay’ box that appears on your screen, review the options you selected, then click the green ‘Pay and set AutoPay’ button. After that, you’re all set! (Please note: Canada and U.S. customers may see a different legal disclaimer in the consent box from the one displayed in the screenshot.)


Step #1. Log In to Your MyAccount Profile

Log into your MyAccount using your username and password. If you don’t have an account, click on the ‘Sign Up Now’ link to create one.

Step #2. Select Payment Preferences

On the overview page, click the ‘Payment Preferences’ button located on the right-hand side of the screen.

Step #3. Choose Accounts for AutoPay

Select the account(s) you want to set up for AutoPay.

Step #4. Enable AutoPay

Select the AutoPay option.

Step #5. Enter Your Payment Information

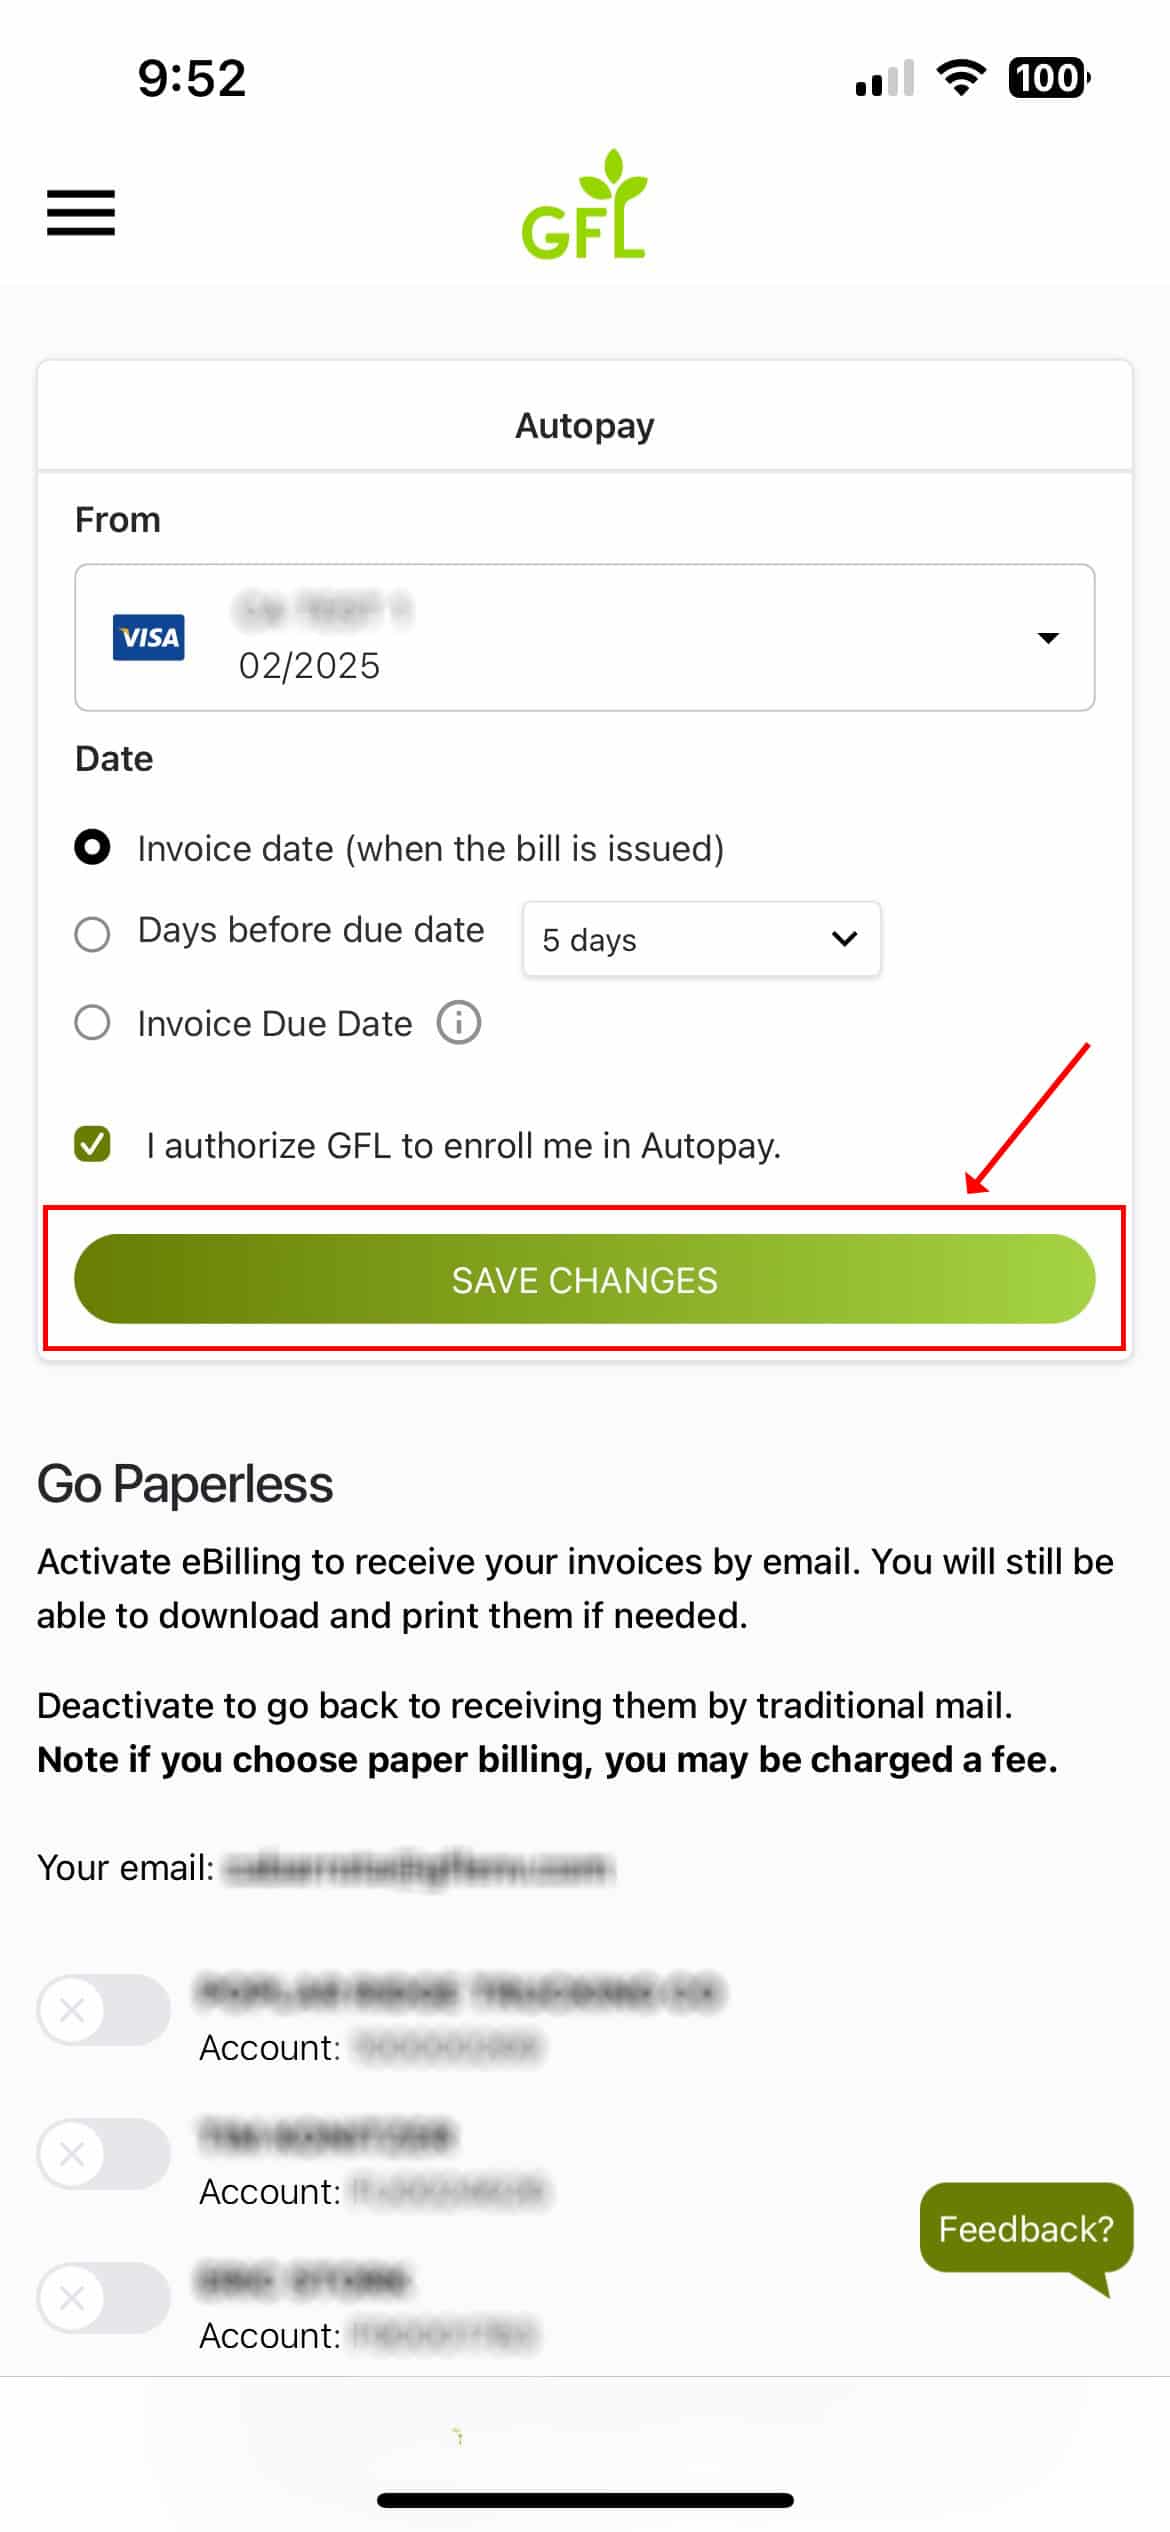
In the ‘From’ section, enter your credit card or bank account details. Make sure all required fields are filled out.

Step #6. Choose Payment Schedule

In the ‘Date’ section, choose when the payment will be charged to your card or withdrawn from your account. You can select one of three options: ‘When the Bill is Issued’, ‘Invoice Due Date’, or ‘Days before Due Date’. If you choose ‘Days before Due Date’, use the drop-down menu to specify how many days before the invoice due date you’d like AutoPay to run.

Step #7. Save Your Changes

Click the green ‘Save Changes’ button. If you have a balance on an account, then you will be asked to authorize a payment to that account before completing your enrollment. Click the green ‘Save Changes’ button. In the ‘Confirm AutoPay’ box that appears on your screen, review the options you selected, then click the green ‘Pay and set AutoPay’ button. After that, you’re all set! (Please note: Canada and U.S. customers may see a different legal disclaimer in the consent box from the one displayed in the screenshot.)

Need Assistance?

You can find more information on our FAQ page, or submit a request for assistance at our Support page.